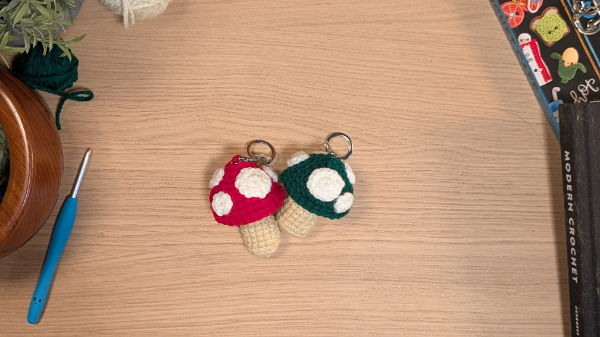
I have a few patterns I like to use that are great for small gifts or even easy items for a craft faire. This mushroom amigurimi pattern is definitely one of them. I will note that this pattern does require a fair bit of sewing for assembly. Given the smaller pieces made for this, it's great for finishing up small balls of colored yarn.
This pattern is probably more on the intermediate side, but pretty quick to make.
Tools & materials needed
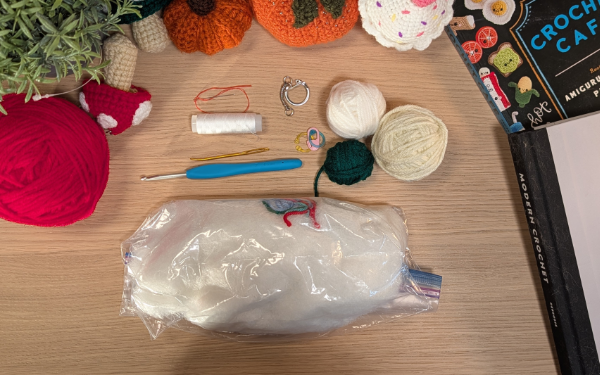
- Worsted Weight (4) Yarn in three different colors for stem (A), cap (B), and dots (C)
- 3.25mm or D crochet hook (Yes, it's small)
- Yarn needle
- Needle and Thread in colors as close to B and C as you can get
- Polyfill fiber or fabric SCraps for stuffing
- Keychain attachment
- Stich marker
Pattern
The mushroom cap and stem are crocheted in the round except for when told to join and finish one more row. The dots for the top of the cap are joined to make the circles more round.
The stitch abbreviation guide.
Stem (Color A)
Make one. Use yarn A and work in the round until told to join.
- Rnd 1: in a magic circle, 5 SC (5)
- Rnd 2: INC in each stitch (10)
- Rnd 3: [1 SC, INC] 5 times (15)
- Rnd 4: in BLO, SC in each st (15)
- Rnd 5: [5 SC, DEC] 2 times, 1 SC (13)
- Rnd 6: SC in each st (13)
- Rnd 7: [4SC, DEC] 2 times, 1 SC (11)
- Rnd 8-9: 1 SC in each stitch (11)
- Rnd 10: [3SC, DEC] 2 times, 1 SC (9)
- Rnd 11-13: 1 SC in each stitch (9)
- Slst into first SC of the same row to join.
- Rnd 14: ch 3 (counts as a TR) and 2 TR in first stitch, 3 TR in three remaining stitches. Join at the end. Leave a decent length trail for sewing and fasting off (27)
Cap (color B)
Make one. Use color B and work in the round until told to join.
- Rnd 1: In a magic circle 5 SC (5)
- Rnd 2: INC in each st (10)
- Rnd 3: [1 SC, INC] 5 times (15)
- Rnd 4: [2 SC, INC] 5 times (20)
- Rnd 5: [3 SC, INC] 5 times (25)
- Rnd 6: INC, 11 SC, INC, 12 SC (27)
- Rnd 7 to 8: SC in each st around (27)
- Rnd 9: FLO, SC in each st around (27)
Dots (color C)
For large dots do the full pattern. For small stop at row 1 and fasten off.
I recommend making 2 large and 3-4 small dots for a good amount of coverage. The dots starting and ending tails can be used to sew the dots onto the caps.
- Rnd 1: 6 SC in a magic circle. Join. (6)
- Rnd 2: CH 1, INC in each stitch. Join and fasten off. (12)
Assembly
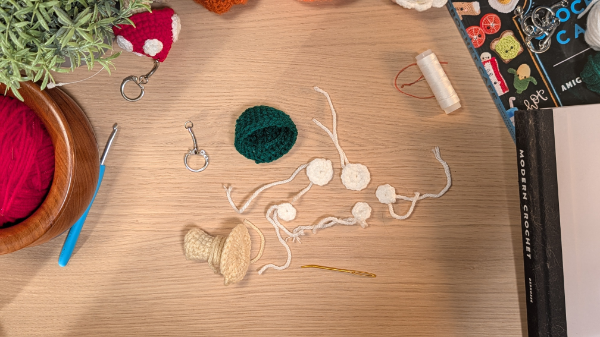
- Sew the dots on. Create a nice spread wiht the dots, use the tails and/or some thread to sew the dots onto the cap.
- Sew on the keychain. Attach the keychain to the top. You can use that starting tail of the cap to help and then secure with needle and thred in a matching color to the mushroom cap.
- Cleanup the tails. Push the tails neatly under the cap part of the mushroom and align the cap and the stem.
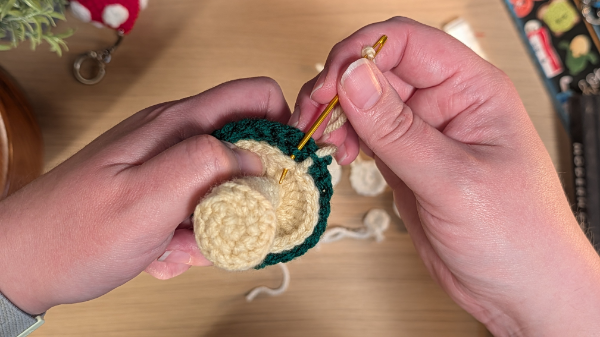
- Start to sew on the cap. Using either the long tail from the stem, the cap or just using needle and thread, sew the stem to the cap. You can use the loops left behind when you crocheted FLO in the caps to help sew the stem to the cap. Stop sewing when you have 3-4 stitches to sew.
- Add stuffing to desired thickness. Stuff! That! Mush! This is a great place to also use sewing scraps (aka sewing cabbage) to stuff the top of the mushroom. In my opinion you won't need a lot here. The tripple crochet posts take up a lot of room.
- Finish sewing. Finish sewing the last few stitches and cleanup the last end.
- Enjoy!
Note: When attaching the cap to the mushroom, you can use the backside of the stitch from the row where you worked in FLO.